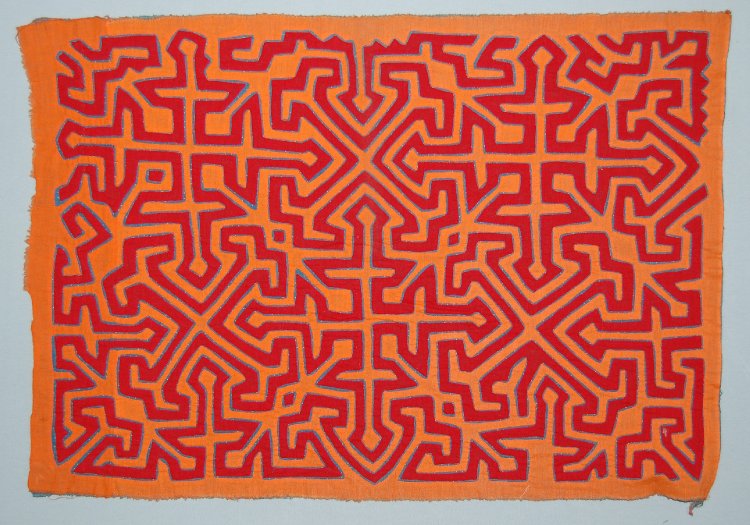
image copyright owner: © The Trustees of the British Museum,
Mola Panel: How to draw a complex geometric pattern
Step 1: First, you have to look carefully the mola panel and to identify the basic pattern. If necessary, try to copy many times the mola panel in a piece of paper, in order to identify the pattern. Almost in any complex geometric design, there is a smaller pattern which is copied, as it is and/or mirrored.
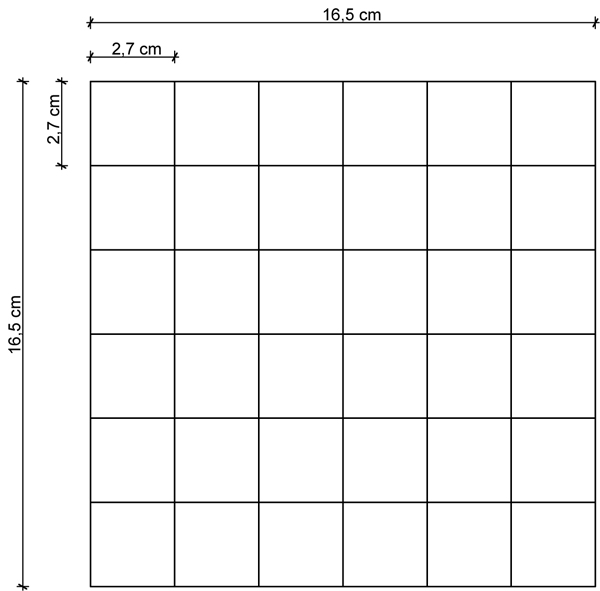
Step 2: Draw a grid, of equal number of squares. The measurments of the grid depend on the measurement of the final piece of fabric.
Step 3: Draw, the basic centered lines of the pattern.
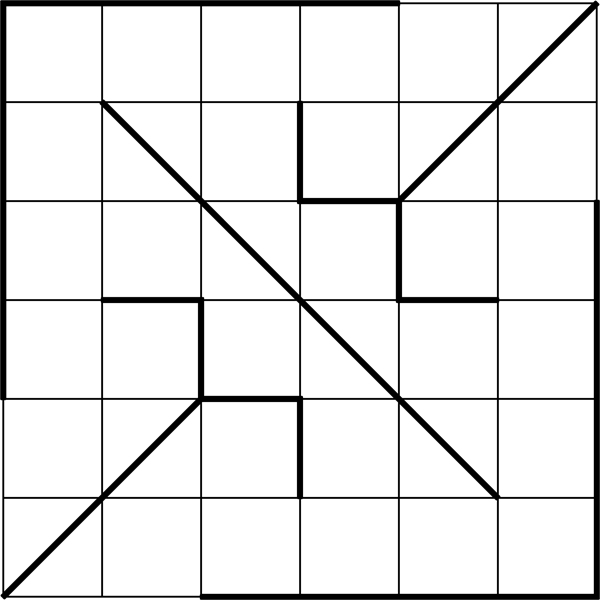
Step 4: Draw, the secondary lines of the pattern
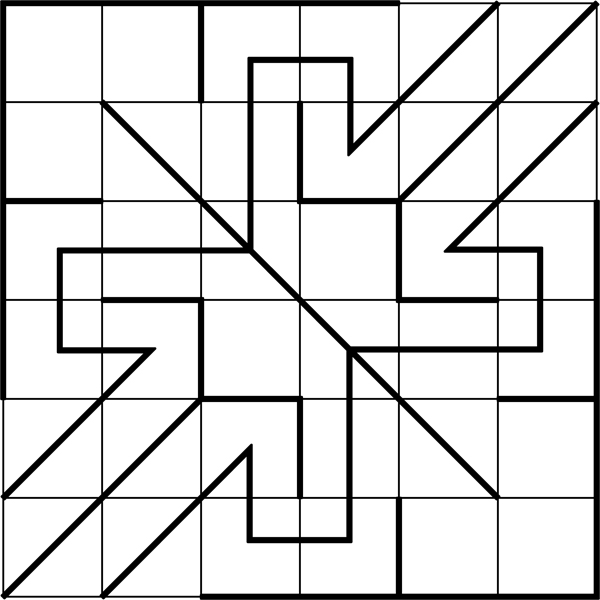
Step 5: Draw, some lines around the basic ones, to give weight to the pattern.
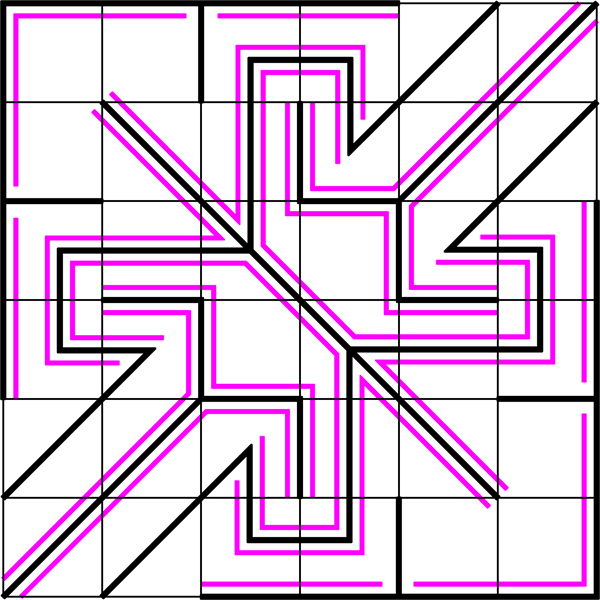
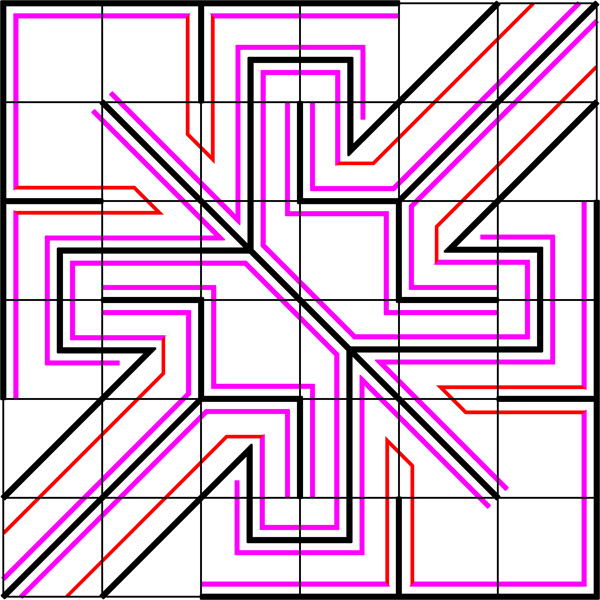
Step 6: Add more lines (the red ones). You might need to make small adjustments, in order spaced to be as equal as possible.
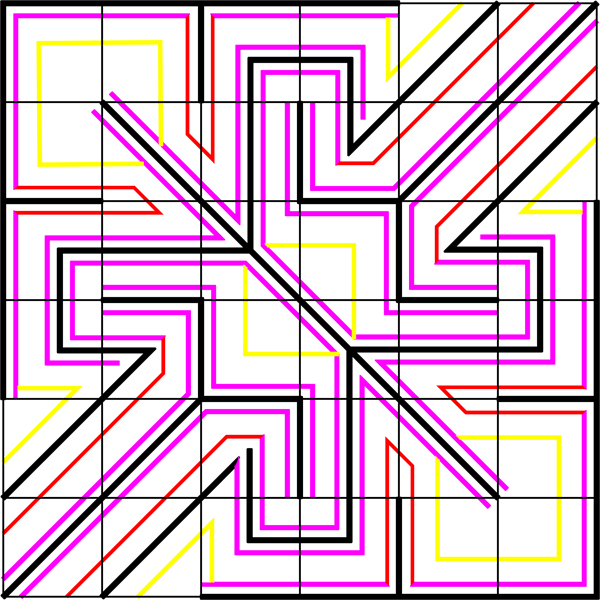
Step 7: Add more more details (the yellow lines). leaving the same in-between spaces.
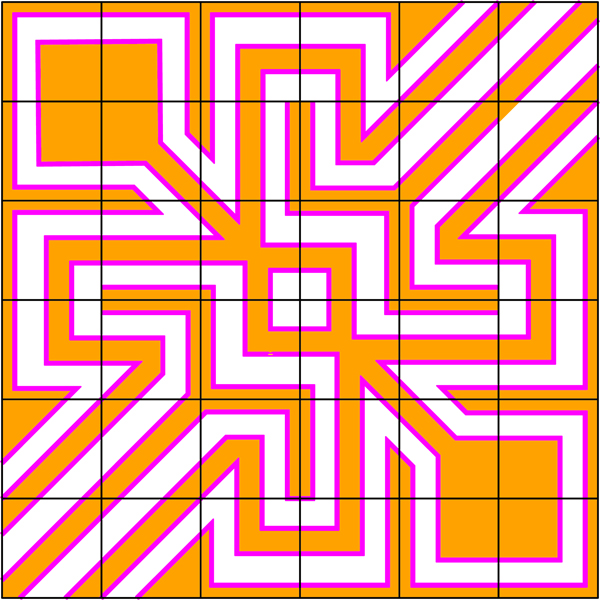
Step 7: Complete the design, and paint the strips
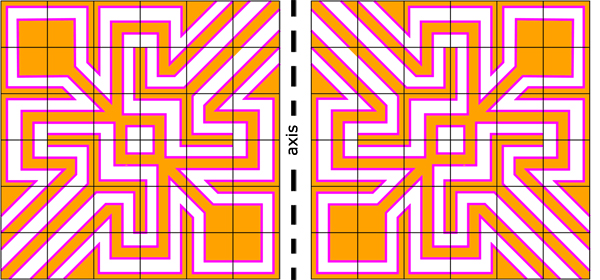
Step 8: Flip horizontally the drawing and copy it. You can photocopy the drawing to save time.
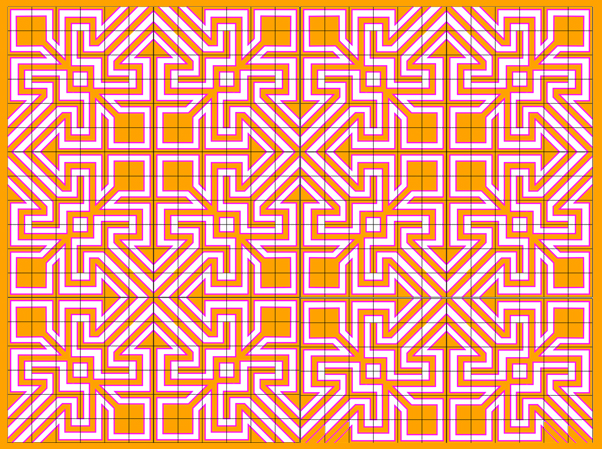
Step 9: Connect the pieces together. The pattern begins to apear.
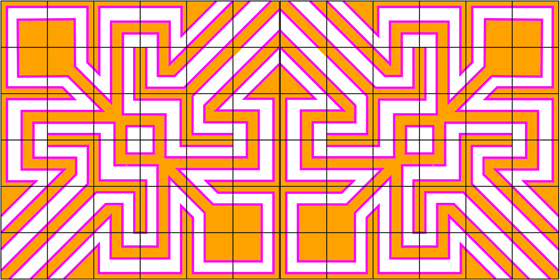
Step 9: Flip and copy the image vertically
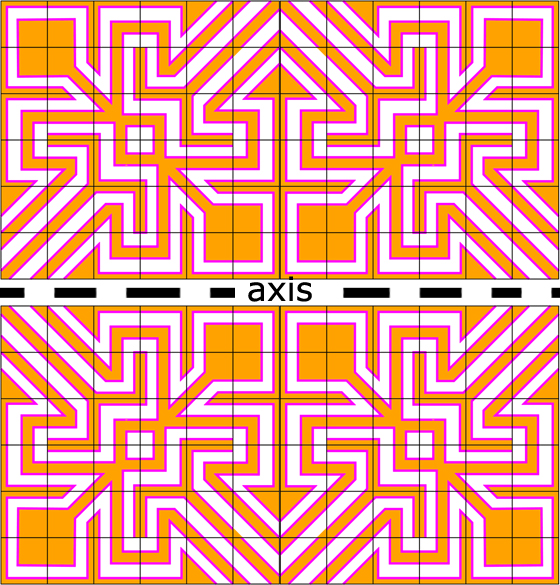
Step 10: Copy the whole picture horizontally
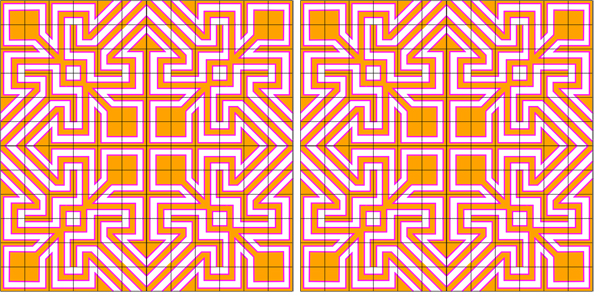
Step 11: Copy the first line at the bottom.
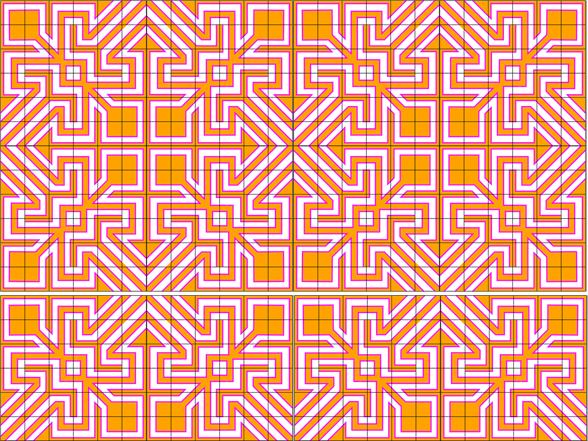
Step 12: Draw a frame around the drawing. The pattern is ready to trasfer on fabric
Learn mola online:
The blog Textile Arts Now offers a free online course on mola art.

| < Prev | Next > |
|---|
Related articles
The most complete book about Furniture Arrangement

Latest advice