Learn how to attach wool roving to a piece of fabric.
Technique: needle felting (or dry felting).
Materials:
-Fiber wool (merino wool)
-Foundation fabric (a cotton cushion cover)
-Felting needle.
-Work surface (dense foam or a thick sponge)
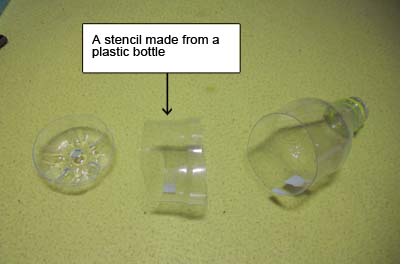
-An empty cylindrical shape (it will be used as a stencil). You can use a cookie cutter or a sticky tape.

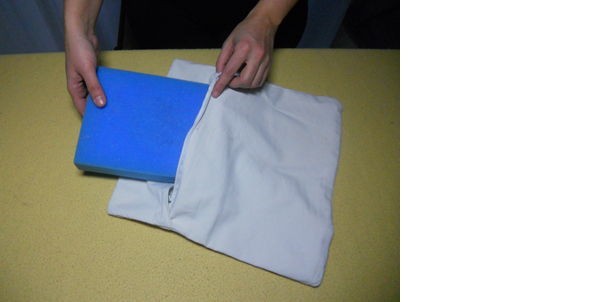
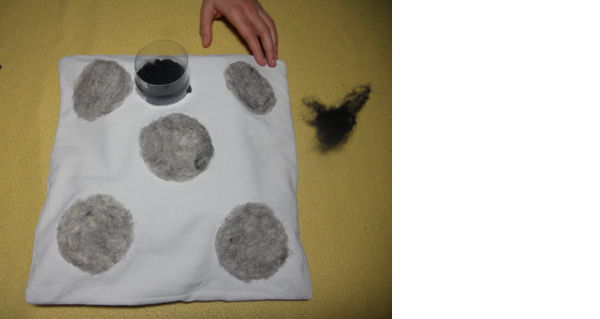
Step 1: Place the foam (or the sponge) into the cushion cover (cotton, wool or denim are recommended fabrics for this technique).
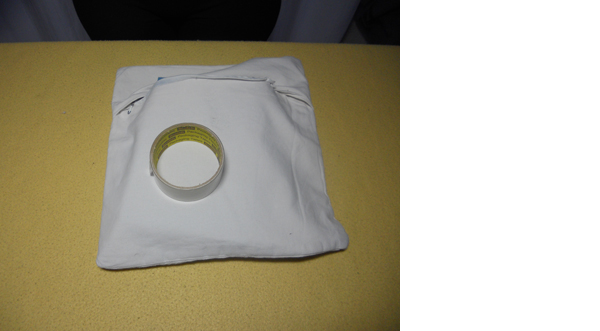
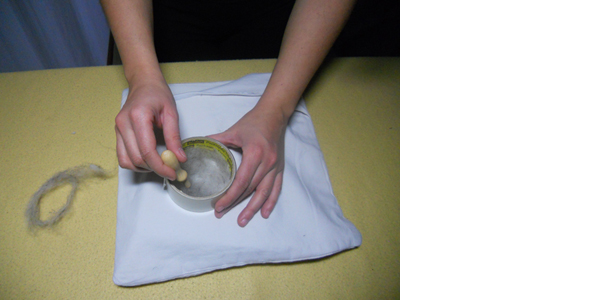
Step 2: Set the cylinder (a sticky tape for example) in the desired location on the fabric.
Step 3: Cut a piece of wool.
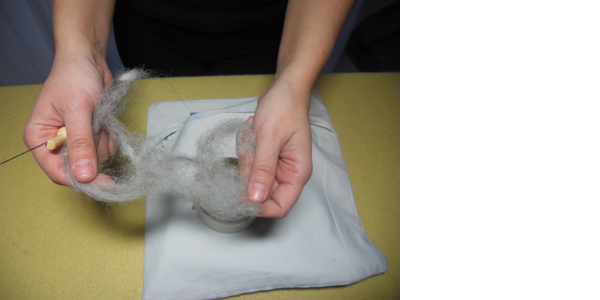
Step 4: Press the cylinder down and fill the interior with roving. Poke with the needle repeadetly along the edge of the cylinder to define the shape. After working along the edges start felting in towards the center of the cylinder. Don't stab the needle too deeply, just enough for the barbs on the needle to pass through the wool and the fabric. Fill with more roving (add more fiber in thin areas) and poke with the needle again.
Step 5: Remove the sticky tape. The wool must be firmly anchored to the fabric.
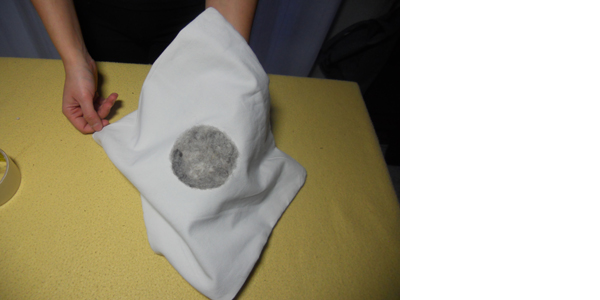
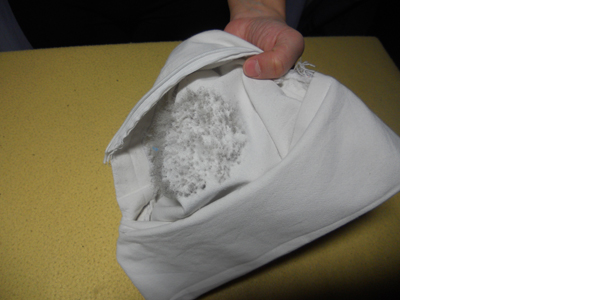
Step 6: Lift the fabric, remove the foam and check the reverse side.
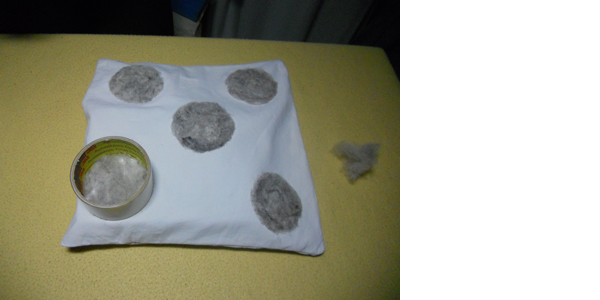
Step 7: Repeat steps 1-6 to add more dots to the cusion cover.
Step 8: You' can add dots of different radius and color. For example you can create a stencil by cutting a plastic bottle.
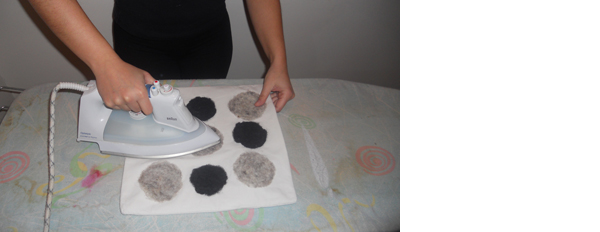
Step 9: Add some black circles.

Step 10: Iron the surface with steam. The stem will allow wool to shrink and to anchor more steadily to the fabric.
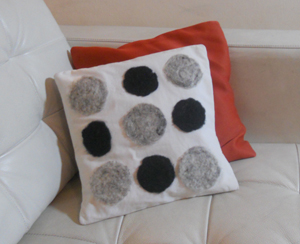
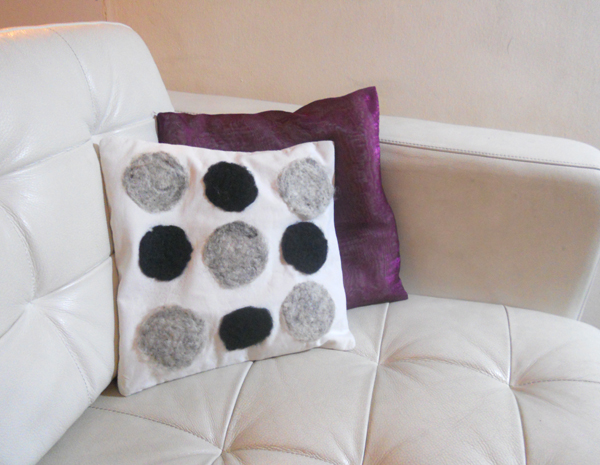
The cushion cover is ready. It is recommended to wash it by hand. For more secure attachment you can sew the wool and the fabric with thread.
Needle safety:
- felting needles are extremely sharp. Keep your eyes on your work.
- Keep your fingers clear of the active work area.
- Consider using finger protectors.


| < Prev | Next > |
|---|
Related articles
The most complete book on Furniture Arrangement

Latest advice